Postman - The Advanced Features
- Nov 1, 2022
- 7 min read
by Łukasz Mudlaff, Senior Java Software Engineer
A Postman is a well-known tool among developers. It provides an API client - a tool that allows us to maintain, execute, debug, and test any API calls. Requests can be easily grouped in collections and workspaces, which can be shared to boost team performance and collaboration capabilities, but this is just the tip of the iceberg. In this article, we are going to explore a few more advanced features which will help you to be even more productive.
We'll use environments to store specific values inside, then we'll try to update them automatically and write some simple logic, based on the request response. I would assume, if you have Postman installed, you would have a pretty good idea on the basics.
New Workspace
Before we start - we need a workspace. You can use an existing one, but I would encourage you to create a new one, to not override anything with previous configurations.

API
Now, we need an API to send requests to.
We can probably build something from scratch, but it's not the main goal of this article. We can use some public APIs here. There are some options available, but for now, let's choose GoREST - a simple, public, and free REST API that provides interesting endpoints covering the most recent scenarios, like user management, blog posts, and comments.
To follow this tutorial, you’ll need an API token. To get an API token, you can log in using any Google, Microsoft, or GitHub account.

First Request
Let’s start with something simple and create the first collection called "Simple". Our first request will be a GET call on /users, to get a list of users. You can use the following curl to import into your collection:
curl --location --request GET 'https://gorest.co.in/public/v2/users' \
--header 'Authorization: Bearer your-token-here' \
--header 'Content-Type: application/json'
Try to run this request, and you should get something similar to:

Environments
Now, the first Postman feature which we will discuss is the option to create environments. You can understand it as a set of variables that can be shared between requests. A perfect example is an API token for the GoREST API, which you should have right now. You can simply copy-paste it to every request, but the bigger our workspace is, the more problems it generates. With environments, we can solve this once and for all, by setting value just in one place. Let's try it by improving the endpoint we've just created.
Creating the environment
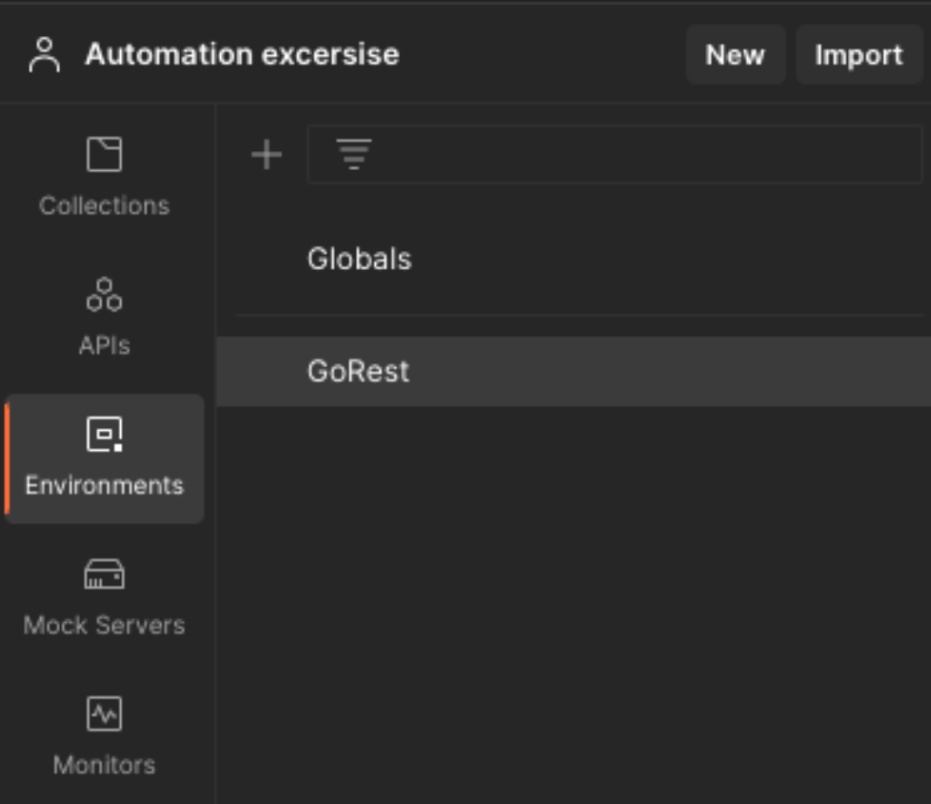
On the left side, you can find a tab called Environments. You should see an almost empty list with only one row - Globals. We’ll go back to them later.
Now, let's create a new environment and call it GoRest.
This is our bucket for variables. We can add a new one, let’s call it a token. Here, you can also choose the type of variable.
We have two options: default and secret.
These names are self-explanatory - for most cases, we should use the default type. This is just a plain text variable. But for sensitive data, like tokens, and passwords, we should choose secret - and in this example, we will use secret. Don't forget to fill in the value with your token and click the save button on the right side of the view. When everything is saved, then the button should be in a disabled state.

The last thing we need to do is to enable the created environment. You can simply do it by choosing the correct option in the dropdown in the top right corner of the screen. Now, created variables can be used across any request we have in our workspace.

Using variables
Now we can edit our request. Simply open the headers list and update the Authorization value to Bearer {{token}}. This way we used variable token from our environment. When we launch a request, Postman will automatically change it into the correct value.

We can also check what’s under this variable, by simply hovering over {{token}}. If everything is configured correctly, you should see a popup with information about this variable. In this case, it’s a secret type, so you’ll see just a series of ****, but we can click on the eye icon to reveal the value.
Multiple environments
A useful option is to switch between different environments. The most classic example can be development, stage, and production APIs. Usually, they are sharing the same endpoints, the only difference is the base URL and authentication data. This is just a perfect example of using multiple environments to store specific values.
GoRest provides us with a few different versions of their API, which we can use in our exercise. There are 3 different API versions, we’ll just use 2 of them. To not interfere with what we’ve done already, let's create 2 new environments: GoRestV1 and GoRestV2.
Global environment
Before we start creating new variables, we can observe that in this specific case, the token will be the same across all environments. This is the perfect scenario to use the global environment. Let's add a token variable with the correct value. Now we have two copies, in global and in the GoRest environments. Which one will be used in the request we created earlier?

On this screen, we can see that the global variable has been overwritten by the GoRest environment variable. It's a useful feature when you have multiple environments with similar variables and some of them are the same, in almost every case, but with a few exceptions. This way we can define a default value in the global environment and override it for specific ones. In our case, it's not that important - for a Simple collection we're using only one variable, so the whole GoRest environment can be removed.
Using multiple environments
Going back to our environments. Link structure to get a user list between v1 and v2 versions are quite similar:
gorest.co.in/public/v2/users
gorest.co.in/public/v1/users
We can use that and parametrize the URL. But first, let's create a new variable api_version with values v1 or v2 in corresponding environments.
Let's duplicate our Simple collection and name it MultiEnv, and update the URL of the request to:
https://gorest.co.in/public/{{api_version}}/usersAs you can see, v1 and v2 have been replaced with the variable name we've just created. Remember to set the correct environment and try to run our request using both of them. You'll see that the response structure differs between API versions.

More usages and dynamic values
Variables can be used not only in URLs and headers but also in request parameters like in the following example:
{
    "login": "{{user_login}}",
    "password": "{{user_password}}"
}
Postman also defines a few useful variables on his own, called dynamic values - because they'll change on every request you send:
{{$guid}} - Random GUID v4
{{$timestamp}} - The current Unix timestamp (in seconds)
{{$randomInt}} - A random integer from range 0-1000
Postman is also providing random variables (with cooperation with faker.js) which represent for example cities - $randomCity or last names - $randomCity. All such variables start with the $ symbol, so they are easy to recognize. The list is quite impressive, so I'll send you directly to the documentation.
Automatization
Postman is also providing an option to execute some logic before or after running a request. Scripts can be written in JavaScript, which opens up a lot of possibilities. To show some of them, we’ll create a simple request counter.

Same as before, let’s start with a new collection named Counter. This time we’ll use a different endpoint, to create a user: POST /public/v2/users. To import it, you can use the following curl:
curl --location --request POST 'https://gorest.co.in/public/v2/users' \
--header 'Authorization: Bearer {{token}}' \
--header 'Content-Type: application/json' \
--data-raw '{
	"email": "{{$randomEmail}}",
	"name": "{{$randomFirstName}} {{$randomLastName}}",
	"gender": "male",
	"status": "active"
}'
As mentioned in the previous paragraph, there are a few interesting dynamic variables that we've used here to create a different user every time.
Let’s create new variables in the GoRest2 environment: requestCounter, and successCounter. Their initial value should be "0", and make sure this environment is active.

Now we can write our script.
Below the URL, there are some tabs, you should already be aware and know a few of them. Now, we're interested in the Tests tab. The code in this tab will be executed, when the response will be received.
Let's start with something simple, and log information about receiving a response:
console.log("Response received!")After sending the request, at the bottom of the Console tab you'll see the log message:

Let's enhance our script to update responseCounter variable in an active environment and run it a few times:
var currentRequestCounter = parseInt(pm.environment.get("requestCounter")) + 1;
pm.environment.set("requestCounter", currentRequestCounter);

console.log("Response received! Current request counter is: "+ currentRequestCounter);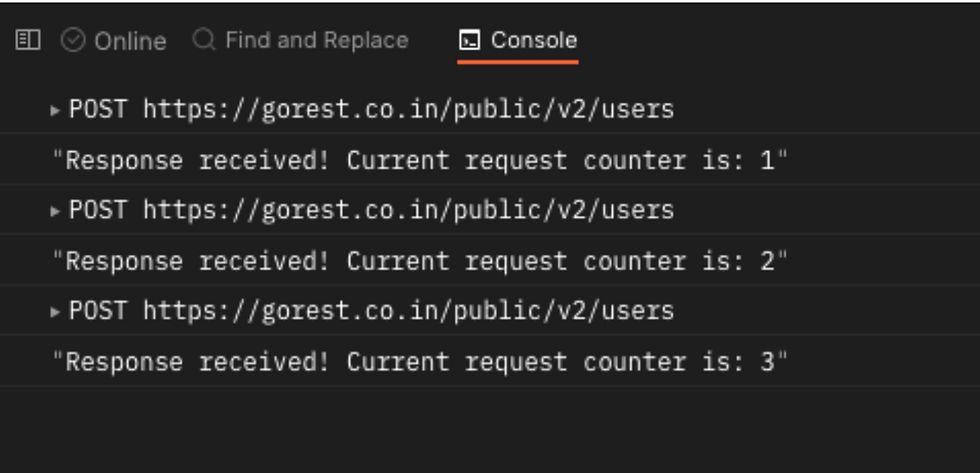
We’ve done a few things so far. Firstly, we get a value from an active environment, using the pm.environment.get() method.
Since Postman stores all values as a string, we need to parse the request count into an integer. This is something we need to remember, especially since it works in the same way with any JSON - they are also saved as strings and need to be parsed back.
After updating the value, we saved it into the same environment variable, using a similar method: pm.environment.set(). Similarly we can get to global variables - pm.globals - and also define local ones - pm.variables - or even on collection level - pm.collectionVariables. All of those can be used in different scenarios, but we're not going to cover them here.
Request data
It's also possible to create our script logic around data from the incoming request. We can get into the body, headers, and status. Let's use it to change successCounter values with the following code (added to the Tests tab, after our current solution):
if([200, 201, 204].includes(pm.response.code)) {
	var currentSuccessCounter = parseInt(pm.environment.get("successCounter")) + 1;
	pm.environment.set("successCounter", currentSuccessCounter);

	console.log("Response is correct, successCounter: "+ currentSuccessCounter);
}
After running it we'll get in the console something similar to:

If we "break" the request, for example by removing the email from the body, then the console log will look like this:

The tests bar is often used to test incoming requests. Postman allows us to write and execute them.
In our case, the if statement is not easy to understand. It could be more descriptive if we take advantage of Postman testing capabilities by using prepared assertions: pm.response.to.be.ok or pm.response.to.not.be.error.
With the first option it will look like this:
if(pm.response.to.be.ok) {
	// ... //
}
Next steps?
Postman offers much more than we covered today. As I mentioned, we can write to check if our API works as expected. We also have the option to chain requests - call a few of them one by one, with updating data between, to cover more complex scenarios like user creation, then edit and removal. After running such a test we’ll get the result in a nice readable format.
Our work can also be stored in the git repository. We can create a team to share whole workspaces or collections, synchronize environments between team members, and so on.
I would like to encourage you to visit the Postman Learning Center and Cheat sheet for a quick condensed guide on Postman.


Networking communication frameworks often implement piso wifi pause time as a secure administration environment for router supervision and internet management activities. Through this browser-accessible platform, users can optimize communication pathways, strengthen digital security systems, personalize online settings, and improve overall network performance consistently.
Play Drive Mad Game offers more than just fun—it's an exciting driving test: navigate your compact vehicle to the end, and though the Drive Mad unblocked is simple to begin, the unexpected hurdles on every route turn mastering these chaotic tracks into a genuine thrill!
Just as emulator games preserve classic gameplay, Postman's tests and scripts ensure your API logic remains functional across changes.
Using Postman's environments to dynamically update variables is as innovative as an AI Image Generator, automating data handling for smoother workflows.
Organizing API collections in Postman feels like building a curated library of retro games; both require careful sorting for optimal performance.